Chapters
Transcript
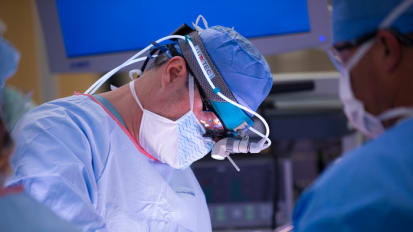
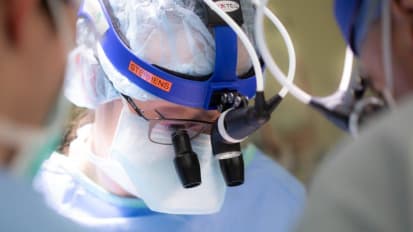
ERIC MOORE: Eric Moore. I'm a head and neck surgeon at the Mayo Clinic. This video discusses fibula free flap reconstruction for osteocutaneous reconstruction of a defect of the mandible. It will include sections on fibula free flap design, harvest, templating, how to use cutting guides, how to use models, inset into the flap in microvascular anastomosis.
The mandible, use of cutting guides is not absolutely necessary. But for more complex defects of the mandible, the ability to 3D model the defect, the ability to use cutting guides to plan the reconstruction, the ability to use models to perfect the reconstruction are highly valuable. In this situation, we have a patient with a lateral mandible defect in several segments that's going to be reconstructed.
To design the fibula free flap, we mark out the fibular head and the lateral malleolus down by the ankle and then plan for preservation of 4 to 5 centimeters of bone, both proximally and distally, to help protect the stability of the joint. The skin paddle, if one is necessary, is designed off the inferior half of the fibula free flap, as this is where the majority of the perforations occur. Any size skin paddle along the line drawn between those two points can be designed.
The leg is then exsanguinated by elevating it, wrapping it tightly with an Esmarch to squeeze out venous blood in the leg and then inflating the tourniquet to 350 millimeters for an adult patient. The incision is started. And the anterior portion of the incision-- the anterior portion of the incision is designed to elevate skin over the entire length of the fibula that's going to be harvest.
And the first step in this incision is to identify the peroneus longus. The peroneus longus is most easily identified by identifying the long white stripe of the peroneus longus tendon inferiorly of the leg. This is found by cutting through the skin and the subcutaneous fat, and then identifying the fascia overlying the peroneus longus, then incising it and elevating it.
After this, the skin and subfacial dissection is elevated posteriorly to identify the septum between the anterior and posterior compartment musculature. The majority of the perforators to the skin coming off the perineal artery lie within the septum. The perforators are identified in the septum, marked, both over the fascia, and then also in the skin for easy identification later after the flap has been elevated and if the skin panel is going to be contoured. If the perforators are not seen coming through the septum, then that means their muscular perforator is coming through the flexor hallucis longus muscle.
After identifying the perforators and marking them, we then elevate the anterior musculature of the peroneus longus and peroneus brevis off of the fibula. This is done by cutting through the muscle and leaving a thin cuff of muscle just over the periosteum of the interior fibula, but elevating the rest of the musculature anteriorly. There will be small perforators coming into this muscle which have to be either cauterized, bipolared, or clipped.
It's important to stay just over the periosteum of the fibula and to leave very little soft tissue onto it. This makes contouring easier. After coming across the anterior portion of the fibula, dissection continues on through the anterior compartment, elevating the muscle, elevating the anterior tibial artery and vein, and identifying the interosseous membrane between the fibula and the tibia.
The interosseous membrane is then incised, the entire length of the interosseous membrane all the way up to the proximal bone cut and all the way down to the distal bone cut. This should be performed several millimeters away from the fibula so as to protect inadvertent injury to the perineal vessels, which lie deep to the muscle there.
After incising the interosseous membrane, we island the skin paddle by making a posterior incision through the skin. The skin elevation continues posteriorly back to a level at the saphenous vein and sural nerve. And then dissection is carried forth the entire length of the fibula to elevate the posterior musculature off the fibula.
At this point, the skin paddle becomes islanded just on the perforators and the septum. Again, if there are no intraseptal perforators, that means they're coming through the muscle and a small cuff of flexor hallucis longus muscle should be harvested. This portion of the procedure is identifying and taking the gastrocnemius and the soleus loose from the fibula.
This is done with careful dissection along the posterior fibula border. There are large perforating vessels that come off the perineal vessels to this gastrocnemius that may need to be divided and clipped. These are usually proximal in the proximal half of the fibular dissection.
Elevating this muscle loose from the fibula at this point allows easy identification of the perineal vessels. At this point of the dissection, everything has been isolated off of the fibula except for the vascular pedicle and its surrounding muscle of posterior tibialus anteriorly and flexor hallucis longus posteriorly. Again, the perforators to the skin coming up through the septum and can be seen both anteriorly and posteriorly on both sides of the skin.
The muscle has been divided partially off the fibula. And the remainder of the muscle is now going to be divided off the fibula to carefully identify the perineal vessels, which can be seen at this point. Again, care should be taken to divide perforators with either a harmonic scalpel or clips or a division in this area, as the perforators can be quite large and bleed.
Here's one of the perforators coming to the gastrocnemius muscle, which is going to be divided with clamps and tied secondary to its diameter. These vessels should be divided several millimeters away from the fibula, again, so as not to injure their take off from the peroneal artery and vein. The fascia overlying the flexor hallucis longus muscle is cut at this point. Doing this allows it an easier elevation and more mobility on the fibula once the bone cuts are made. This fascia can be divided the entire length of the flexor hallucis longus muscle.
Proximal bone cut is then made by passing a curved clamp immediately deep to the fibula just super periosteally at the level where the bone cut is going to be performed and then passed in a Gigli saw. Cutting from medial to lateral prevents inadvertent injury to the perineal vessels, which are deep to the fibula at this point. The proper way to use the Gigli saw is to keep the saw handles very wide and to cut from side to side rather than up and down. This will keep the soft from locking out.
Be sure to protect the surrounding soft tissue so it's not abraded by the Gigli saw. This is a relatively atraumatic cut in the bone. Cuts are made proximally and distally. And at the time that the distal cut is made, the fibula then can be elevated slightly laterally to identify the distal perineal artery and venae comitantes.
If these vessels are not seen, it means that they're just deep to the posterior tibialus in a small amount of muscle that needs to be cut. Once these vessels are identified, they're clamped and tied distally. The perineal vessels maintain their width throughout the entire length of the fibula. And reports have been made of actually sewing distally to the perineal vessels as a continuation flap.
To isolate the vessel, divide the posterior tibialus muscle anterior to it and the flexor hallucis longus posterior to it. There are perforators in this muscle. So this needs to be divided in a hemostatic method as well. This is someone using ultrasonic shears. Divide the muscle several millimeters medial to the fibula. Again, the vessel is up against the fibula at this point. And this will prevent inadvertent injury.
By dividing the posterior tibialus and the flexor hallucis longus equally, the bone can be further and further mobilized and lateralized, which will give the surgeon more room for dissection. At the termination of the flexor hallucis longus muscle, which is shown here, the perineal vessels start to diverge medially away from the fibula to join the posterior tibial vessels. This is showing the posterior tibial nerve and posterior tibial artery and vein medially and the perineal vessels up against the fibula laterally. The entire length of the posterior tibialus muscle is divided up to the proximal bone cut. And at this point, the flap is only pedicle on its vasculature.
Any perforating vessels coming off the perineal medially are divided. And the fascia overlying the artery and vein is divided so as to allow individual clamping and tying of these vessels. All of this has been done under tourniquet time. Tourniquet time should be kept under an hour and a half to prevent ischemic changes to the lower extremity.
After isolating the vessels and dividing the fascia, then the tourniquet can be released and the flap can be allowed to reperfuse. Typically, we allow the flap to reperfuse for approximately 10 minutes. This allows several things. It allows the elimination of some of the ischemic metabolic products in the fibula to be cleared. And it also allows time for small vessels, which are vasoconstricted to vasodilate, at which point they can be recognized and controlled prior to cutting and insetting the flap.
Care should be assured that the posterior tibial vessels and the anterior tibial vessels are patent and running at this point. The vessels can be divided and the flap can be taken to the back table or contouring can be performed in situ. The advantage of performing contouring in situ is that you can ensure that all the segments have adequate vascularization while it's still in the leg. To do this, we strip back the periosteum from the vessels to lengthen the pedicle.
This is showing attachment of a cutting guide with monocortical screws to the fibular segment. Once the cutting guide has been attached, then we do subperiosteal dissection around the segments that will be removed-- the intervening segments that will be removed in order to create the bony segments that we want. The periosteum should remain attached to the bony segments that are going to remain as part of the reconstruction and then stripped away from the intervening wedges that are going to be taken to perform wedge osteotomies and contouring of the fibula.
An instrument is placed between the vasculature and the bone during cutting to prevent inadvertent injury to the saw. And a sagittal saw under irrigation is used to remove wedges that have been predetermined in their size and shape by previous planning and formation of the cutting guide. The osteotomy should be carried forth full thickness all the way through the bone so that these wedges can be completely removed. Avoid the temptation to fracture the bone rather than completely removing the wedges, as this will make contouring more precise and even at the remaining segments.
The proximal bone that's not going to be incorporated into the flap is removed. And this allows lengthening the pedicle. The more the proximal bonus removed, the longer the pedicle becomes. After the flap is contoured in situ, then the vessels are divided. We place two clips proximally and distally on each of the vena comitantes. We place two clips distally on the perineal artery. And then we clamp and tie the proximal perineal artery in the patient. The two clips ensures that we know which vessels are going to be used for anastomosis. Although this sounds obvious, it can be confusing once the flap is detached and inset into the patient.
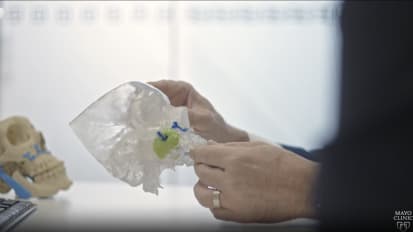
The flap is placed into a kidney basin with a wet salt. And it can be taken to the back table. Use of a preformed model to help bend the plate saves a lot of time. This is showing bending of the titanium reconstruction plate to be contoured to the reconstruction model. After the plate is contoured to the reconstruction model, then we can ensure that it will fit precisely against the fibular segments that we've cut with the use of the cutting guide.
The fibular segments are placed up against the model to ensure that we have the appropriate length and angles. Adjustments could be made at this point if necessary. If the cutting guides were designed and used properly, then no adjustment should be necessary. And then the segments are plated with monocortical screws to the reconstruction plate that we've already bent. And the construct is ready to be inset into the patient. Use as few screws as necessary into the bone to prevent devascularization or excess foreign material being implanted into the patient.
A final check against the cutting guide ensures that we have the flap in its proper orientation and size. In this flap, the vessels are going to be brought anteriorly to the opposite side of the neck. The pedicle is shown here inferiorly. It could be brought to the ipsilateral side of the neck as well. Or we could have designed the flap to have the vessels come out more proximally.
The skin paddle on this side in this patient is going to be brought out medially and used intraorally. The preform flap attached to its plate is then inset into the patient with monocortical screws. Insetting is done with mattress vicryl sutures. And now we're ready to perform vascular anastomosis.
The fibula flap typically has a single perineal artery and two venae comitantes, which are fairly large in diameter compared to most of the other microvascular free flaps of the neck that can be anastomosed. When we have the option of anastomosis in two veins, we usually take that option to give us more venous outflow and potentially salvage of a flap if one of the venous outflows could become compromised. It's more common to have compromise of the vein than the artery, if you are going to have any post-operative arterial problems.
An appropriate sized artery in the neck is selected as a donor artery. It's clamped with a microvascular atraumatic clamp, cut, irrigated with a heparinized saline, dilated with a vessel dilator, and the adventitia is trimmed back by several millimeters to prevent incorporating the adventitia into the anastomosis. Care is taken to make sure that the donor artery and the flap artery can meet each other with no tension. And then, 80 nylon microvascular suture is placed for a running anastomosis in most circumstances, if applicable.
The anastomosis is initiated by placing two sutures 180 degrees apart and tied with three simple knots. The needle is left on the suture. The other suture is placed approximately 180 degrees from this suture. And the needle is left on. And then those two ends are run towards the surgeon in a running anastomosis. The assistant can help with the procedure by providing suction, [INAUDIBLE] out the vessel, irrigating with heparinized saline, and making sure the tension is taken off the vessels during anastomosis.
This is the anterior portion of the arterial anastomosis, showing tying the second suture 180 degrees apart. The keys to this anastomosis, again, are to provide a tension-free anastomosis. The vessels should have reasonable size match, they should not be redundant with kinking, and they should not be under excessive amount of tension. Once the anterior anastomosis is run and tied to the opposing free end, the vessel is then flipped over to see the back side of the artery.
At this point, it's inspected, irrigated with heparinized saline, and then the posterior anastomosis can be done. Flipping the clamps over allows the vessel ends to open up so the surgeon can see both the external surface and the intima of the vessel. And again, it's irrigated with heparinized saline at this point to ensure that no back wall sutures have been placed and that the back side of the anastomosis looks appropriate.
The sutures should be evenly spaced. They should not leave any gaps that could leak once the clips are released. Minimal tension is placed on the sutures. And then they'll all be tightened prior to throwing the final knot. After the arterial anastomosis is performed, the venous anastomosis is typically performed with the help of the venous coupler.
An appropriately sized venous coupler is chosen. There should be minimal tension on the veins, so choosing a venous coupler slightly smaller than the diameter of the vein is usually effective. The vessel ends are pulled through the coupler and then pulled out over the coupler pins, and draped over and impaled over these pins on each side.
Since the portions of the vessel lateral to the pins will remain external to the anastomosis, the inner edge of the vein can be grabbed at this point as opposed to the technique used for the artery. The anastomosis is irrigated with heparinized saline. The coupler is closed. And then a mosquito is used to crimp the couple to make sure that it is tight.
Make sure, at this point, that the vein has not been twisted. And then the venous clamps are removed by removing the proximal and distal clamps off of each vein and then the flap side clamp off the artery. Prior to removing the patient's donor side artery clamp, make sure that you have a stitch in your hand that could be used to place quickly over any anastomotic leak.
This is demonstrating filling of the flap. Usually with release of the clamps, there will be some bleeding immediately from the muscle in the fibula free flap. There's a small hole in the flap artery just distal to the anastomosis here, where a branching point was not appreciated. And the suture is going to be placed through this hole to provide hemostasis.
Don't be alarmed if there's some rapid bleeding from the flap at this point. Usually this will slow down after several minutes. The flaps should be irrigated with warm saline. And any obvious arterial sources of bleeding should be sought out and managed with either clips or sutures.
Typically, immediately upon releasing the clamps, there will be some vasoconstriction. And so we place gel foam soaked in papaverine around the vessels and irrigate with warm saline to help with the vasoconstriction. It may be useful to get the patient's blood pressure elevated by [INAUDIBLE] conversations with the anesthesiologists at this point.
The fibular free flap has its advantage as a very reliable and broad skin panel that can be placed either intraorally or externally, or both, as the needs may be. The arterial vessels are a very reasonable diameter to match vessels in the neck. And it's the workhorse flap for mandibular reconstruction.
Mayo Clinic otolaryngologist Eric J. Moore, M.D. demonstrates a fibular free flap reconstruction of a mandibular defect following an oncologic resection for oral cavity cancer.
Related Presenters

Dr. Moore is a head and neck cancer surgeon and facial plastic and reconstructive surgeon in the department of Otolaryngology-Head and Neck Surgery. Dr. Moore specializes in complex tumor removal and reconstructive surgery of the Head ...
Related Videos