TODD BARON: The first step is to unlock the device so that you can advance the catheter forward. And if you look on your echo view, you can see the catheter come into view. So now the stent is inside the cavity. So the next phase is you want to ideally have up to about your thumb on that catheter inside the cavity and then lock.
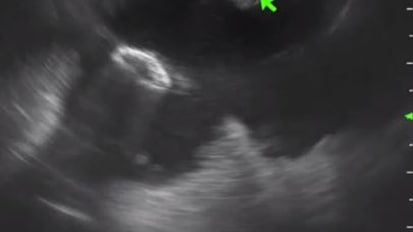
Step two is to take the safety off which is by pushing it down, and then you want to unlock here and deploy the internal flange, the flange that's away from you inside the cavity. So you can see there under echo, it's in good position inside the cavity. But we then need to withdraw it so that it's tense inside the cavity.
The next step is to unlock step three and pull the delivery system back until the stent changes shape from a disk, so football shaped, which is about right there. Then crucial is to lock once again. This is a crucial step before deploying the proximal flange.
So now we're going to deploy. But at this point, we know that when we deploy, it'll be inside the cavity but also inside the endoscope on the proximal end. So we're not going to do this right now under endoscopic view, although we can see endoscopically that our black mark is there.
So then we're going to deploy the last step. And then I think what's key is to make sure that the stent is pushed out of the endoscope by unlocking and re-advancing to push it out of the endoscope. And you can see the deployment there.
And then when you look under echo, you can see the distal flange inside the cavity, nicely, by rotating, and we can see endoscopically that the stent is in good position inside the stomach. And then we're going to back away and actually look endoscopically for the black mark. So now we're starting to see the black mark right here in good visualization, endoscopically, and then we know we can deploy our second flange. We can see the black mark. We make sure we're locked here, we're unlocked here, and then we deploy, and it's in good position.