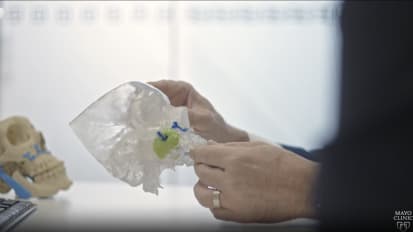
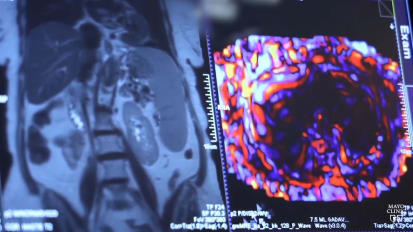
GARRET CHOBY: This is Garret Choby, and today we'll be illustrating a case of an endoscopic transsphenoidal approach to a pituitary tumor. This is a case with myself and Dr. Van Gompel. What you can appreciate on this MRI scan is there's quite a sizable tumor. This is a non-functioning pituitary macroadenoma with compression of the optic chiasm. In fact, this patient's main presenting symptom was bitemporal hemianopsia.
The other thing that you can appreciate about this MRI scan is that this patient has relatively limited sphenoid pneumatization, with a very limited lateral recess on the right side and a slightly larger lateral recess on the left side.
Initially, it's important to fracture the inferior, middle, and superior turbinates, as you'll see here. Typically for most pituitary cases, there's relatively normal nasal anatomy. And therefore, it's fairly easy to identify the sphenoid os just medial to the superior turbinate.
Here we are with a Freer elevator, outfracturing that middle turbinate and identifying the superior turbinate. Ideally, you can advance this Freer elevator just between the middle and superior turbinates to get a nice outfracture of that middle turbinate. This patient's turbinates were especially osteitic, so it took a fair bit of force to get those to move over for us.
Now here we are outfracturing the superior turbinate and identifying the natural os, the sphenoid sinus, just medial to this. And again, pretty normal anatomy in this case, as the patient has no additional sinonasal issues. And there's that natural os, the sphenoid sinus there.
Here we are using a 1-millimeter up-going Kerrison, as well as a sphenoid punch, to open the os on this side. We are planning to raise a nasoseptal flap in this case. And by releasing this mucosa around the os, that will allow that flap to be lifted away nicely and then tucked into the nasopharynx after it has been raised. We're careful here not to go inferiorally below the os and thus compromise the pedicle, so we're staying on medial, lateral, and just superior.
Here we are coming into the patient's contralateral nasal cavity and, again, outfracturing the inferior, middle, and superior turbinates, as you can see here. And that allows us to identify the natural os, the sphenoid, on this side as well.
So here's the patient's left sphenoid os. And then again, we'll open that with a 1 Kerrison here and allow that mucosa to be released. Here we are back in the right nasal cavity, ready for the next step, which is creating a posterior septectomy.
I do that behind the head of the middle turbinate in just the level the natural os. That ensures that as you take this posteriorally, you're not compromising the arterial source for your nasoseptal flap. I keep a pledget on the contralateral side to protect the contralateral middle turbinate from the Freer and the through-cut, as you can see here, as we're taking that septum directly back to the natural os on both sides, which will allow us to peel down the mucosa over the keel of the rostrum.
In this case, I elected to raise a right-sided nasoseptal flap, as it was a sizable tumor, and we were anticipating a likely CSF leak. So here we are, outlining the incisions for that.
The important part is getting in the proper plane early on and then raising this from anterior to posterior. Usually we'll leave some of the tenacious fibers up high to keep this elevated while we raise it down low. And then usually we'll come across those with a scissor towards the end to release them and then tuck this into the nasopharynx.
As you can see, this exposes the entirety of the bone of the rostrum. You can see the keel of the rostrum being exposed there as well. Take a nice down-going 2-millimeter Kerrison and remove the bone of the rostrum here down to the clival recess in the floor of the sinus in order to remove the keel of the rostrum.
Then here we are on the patient's contralateral side. We always preserve a rescue pedicle as well, as you can see in this case. We're going to peel that mucosa down towards the choana and peel it over laterally, exposing that bone again to allow us to use a down-going 2-millimeter Kerrison to take this down to the floor of the sinus as well.
And once that's released superiorally, you can use a closed Jansen-Middleton or a Ferris-Smith forceps in order to remove that keel of the rostrum. When removing this piece of bone from the nasal cavity, it's important that you do not accidentally shear the mucosa on the way out.
So it's important to visualize this and remove it in a fashion that's atraumatic to the surrounding nasal cavity. Then you can begin to remove the intersinus septations, as you can see here. The cell has been quite dilated from the tumor itself, but the partitions can be removed back as far as possible.
Now I think it's important to have this exposed from the clival recess at the floor of the sinus, ideally the whole way up to the planum in most cases to allow adequate visualization for your neurosurgical partners. Here we are with an up-going 2-millimeter Kerrison. They have a 45-degree through-cut, expanding that superior lateral portion of this sphenoid, as you can see here.
At this juncture, our neurosurgical partners will enter the field and demucosalize the area overlying the sella. Again, as you can see in this case, it's quite an expanded sella due to the patient's large tumor. And remove the last of those intersinus septations.
Now, after the tumor has been removed, what you can see here is a bit of Gelfoam deep, and then my neurosurgical partner is placing in some abdominal fat there as well. There was not a significant CSF leak during this case, so we did not feel the need to place the septal flap over the defect.
Instead, what we elected to do was to replace the nasoseptal flap overlying the septum where it came from. The important things here are to make sure that the septal flap is in the proper orientation and unfurled completely, as you can see in this particular case.
Then ordinarily I'll use a 4-0 plain gut suturing needle to suture this into place in a quilting fashion in order to hold that into place. In certain situations, you may elect to use silastic sheeting or Doyle splints to further provide some support for that septal flap. And then here we are examining the flap posteriorally after it's been sutured into place, ensuring that it's lying back nicely on the spot that we raised it from.
In summary, key aspects for a pituitary approach are opening the natural os, the sphenoid, on both sides, and then gaining full access to the bilateral sphenoid sinus by removing the keel of the rostrum and having access from the clival recess up towards the planum, depending on the extent of the tumor resection.
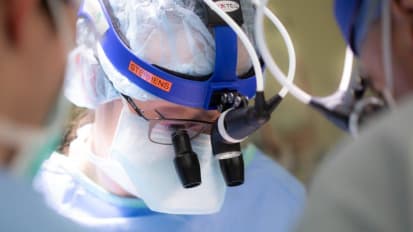
It's also key to realize that this is team surgery, and the person running the nasal endoscope has a key portion of this surgery assisting his or her neurosurgical partner with visualization and acting as an extra set of eyes.